Shelfari Shelf

Tuesday, February 28, 2012

Second Salamanders Squad


I'm not a big fan of the pics this week, Only one really turned out decently bright. Which is odd, since they are all taken under the same conditions and in the same spot. Clearly I need to look into a better lighting setup than I have. The overhead lights in the room are good enough for painting, but not photography.


As I knew I needed to do, I went back and painted over the carrier film on the models that I previously painted. Then, when the last Salamanders tactical squad was done, I went back and made sure that was taken care of here as well.


The only major difference between this squad and the first one was the addition of some more bitz on the models. I also wanted the sergeant to be equipped differently, so he has a bolter and bolt pistol. However, I added a tabard to his front armor to help him stand out more.


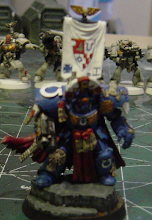
In looking at the force as a whole, it is definitely one of the smallest 1k forces you can build. I realize Vulkan is overkill, and even the Land Raider is. However, I wanted to start a force that reflects the level of equipment the Salamanders have access to; as well as make one that represents them as a force. I know down the line I want to add a terminator squad or two, as well as some more flamer or multimelta wielding units.

Sunday, February 26, 2012

Painted Deimos Rhino


Finishing the Deimos was pretty easy. A couple of brass etched Ultramarines symbols were added to the kit for detail. Then on to painting. I did make a few messy mistakes with the white, but I think that was easy to fix. Overall, I decided to avoid gold in the color scheme, and stick with blue, white, silver and black.


The blue was done with a base coat of GW Regal Blue, followed by a coat of Ultramarine Blue. Then a 50:50 mix of Ultramarine Blue and Ice Blue was done with a sort of controlled dry brush technique to add highlights. Finally I applied an extreme highlight of Ice Blue.


The white was just a couple coats of straight up P3 Morrow White, and the black was done with just GW Chaos Black. The silver was done with a coat of Boltgun Metal, then Devlan Mud and finally Chainmail. The lights were done with coats of P3 Sulfuric Yellow, then GW Golden Yellow and lastly P3 Cygnus Yellow. Finally, the red was done with P3 Sanguine Highlight, Khador Base and a dot of Khador Highlight.

Tuesday, February 21, 2012

Vulkan He'stan


Finecast has spoiled me. It had been so long since I had to work with pewter, I actually had some problems with glueing this model. When the glue didn't bond quickly enough, I whipped out the Insta-Set and spritzed away. For those who don't know what Insta-Set is, it is a catalyzing agent that hardens cyanoacrylate within ten to fifteen seconds. Sounds great right? It also causes heat during this reactions, and could possibly give a person a minor chemical burn (or startle you enough to drop the fig).


The first thing I noticed after priming, was that my Vulkan's face was a bit more blotchy than the GW pic, and upon some careful chipping, I realized I must have over glued the model while building it. Then his arm broke off again - another aspect of Insta-Set is it can occasionally create weaker bonds. Bitch fest ended, I hope.


On to the actual painting. Vulkan is probably as blinged out as Calgar, so I started with base coats of P3 Sanguine Base on the cloak and the flame areas, Hammerfeld Khaki on the white areas, Gnarls Green on the greens, and GW Darven Bronze on the gold and Boltgun Metal on the silver. I then gave the whole model a Devlan Mud wash to darken the cloak a bit more and add some depth. The Golds were finished with GW Shining Gold and and Burnished Gold. The Silver with Chainmail and the bone with P3 Menoth White Base. The green is finished with P3 Iosan Green and Wurm Green, and the Black with layers of GW Chaos Black, P3 Coal black and an extreme highlight of GW Codex Grey.


I built up the color on the cloak with P3 Sanguine Highlight and then a highlight of Khador Base, these same layers were used for the purity seals and flames, with a highlight of Sanguine Highlight on the purity seals, and the same color made the orange layer on the flames. I finished the flames with layers of GW Golden yellow and P3 Cygnus Yellow.

Saturday, February 18, 2012

Dan Abnett's Know No Fear


This is the novel I have been waiting for since the Horus Heresy series began. What surprises me most, Dan Abnett is the author, and not Graham McNiell. I remember asking McNiell at a Gamesday, back when the Horus Heresy series was just starting if he planned to write the Battle of Calth, and he had said he had drawn a ring around it, and it was his. I guess time, or more pressing projects changed that. Know No Fear is a great novel in the best tradition of Abnett. It especially resonates with me as I'm a big Ultramarines fan, and the horror of the Word Bearers' betrayal and the subsequent carnage fleshed out in all its horrid detail helped this novel fly by. I pretty much read it in a twenty four hour period. The end is nothing but sublime. It's a great read, great buy. STop reading this blog, go get it and read it!

Sunday, February 12, 2012

Salamanders Land Speeder


Sticking with the theme of Melta and Flame, the Salamanders are reinforced this installment with a Land Speeder Tornado equipped with Heavy Flamer and Multimelta. This was a straight build, with the pilot and gunner of the Land Speeder built separately from the speeder itself. This would allow for ease of painting, but also ease of application of the water slide transfers.


There wasn't any real experimentation with the Land Speeder, the main addition to the scheme is the spot light on the front. This was done with layers of P3 Sulfuric yellow, GW Golden Yellow and P3 Cygnus Yellow. The greens were done with P3 Gnarls Green, Iosan green and Wurm Green.


Typically, I leave the flying stands of my models clear. Probably because they can match whatever terrain they are put on that way. The only thing this model definitely needs (as the pics show) is some touch up over the carrier film of the transfers. It is a step I need to go back and do on the Tactical Squad as well. Next time, I have a special character to show off.

Tuesday, February 7, 2012

Blood Ravens Dreadnought


My final Blood Ravens unit is a dreadnought built from the Space Marine Dreadnought kit. I used bitz from a Venerable Dreadnought kit to add a bit of customization to the model, so that even though it is basically a Lascannon, Missile Launcher dreadnought, it still has a higher level of detail than the basic kit. I also used the Iron Halo, a few purity seals and one of the leg armor bitz as well.


The dreadnought was kept predominantly red, using P3 Sanguine Base, Sanguine Highlight and an extreme highlight of Khador Base. I kept the majority of the other areas silver using GW Boltgun Metal, Devlan Mud and Chainmail in respective layers. Then the engine cowling was painted Chaos Black with the Mechanicus symbol painted in the traditional half black (Chaos Black) and half white (P3 Morrow White) colors.


While this is the last Blood Ravens model I will be working on for a while, I did enjoy the army. With the exception of the two Librarians, I think it works pretty well as a balanced Codex Space Marine army. I won't be purposely revisiting any of the "finished" armies until I have a representative of the loyalist First Founding legions done, but I have a feeling I will be coming back to the Blood Ravens eventually.

Sunday, February 5, 2012

Deimos Rhino


Along with my copy of IA:11, I also ordered a Deimos Rhino kit. I was interested to see how the kit pieced together, and excited when I got my hands on it. The exterior sides are replaced with resin ones, as are the side doors and the front of the rhino. The turrets and hatches are also swapped out with a single bolter mounted on each. Topped off with four exhaust vents and a shiny )and pointy) dozer blade, and the kit is complete. I'm looking forward to building the kit, as it looks pretty darned cool.