.JPG)
One thing I have learned about Forge World over the years, is that unless you fall in love with the first version of a model they have produced, be patient. Not only is there a demand crunch that can make wait times for delivery lengthy, but Forge World will often produce variants that can be more interesting, or effective in game. For me, this was the case with the Sicaran Battle Tank. When I first saw it, I liked it a lot. But the armament wasn't exactly my cup of tea. So I decided to wait - I've taken the same approach with the Spartan, and though liking a lot of the variants, just haven't been able to afford it as of yet. Well, I can be honest, there are cooler models I would rather have first.
.JPG)
The Sicaran tank is a pretty easy build. It is a complete resin kit, and the sides are all of one piece. This means you don't have to worry about adding in a whole bunch of separate track pieces, and then not being able to get them all to fit properly. The most difficult part of the build is probably the power coils, but even they are only problematic because of the tightness of the space they go into. There is no crew to be added to the heavy bolter sponson, however anyone who wanted to spend the extra money or put together one from spare bitz could do so. I chose not to as, more often than not, I prefer the buttoned up look. Once built, I chose some brass etched pieces from the Ultramarine Brass Etched sheet that i still had left and added them to the sides and front.
.JPG)
When painting, I always use black primer from Duplicolor. It has good coverage, but should definitely by used out of doors as if you are not using a deep box (mine is an old army boxed set) it can splash all over the place. For those interested, Duplicolor is available at Advanced Auto Parts, and is a sandable primer. It is about $7 with tax and is infinitely better than the GW product both for price and coverage.
.JPG)
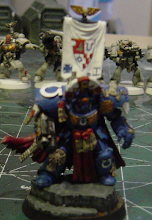
Finally, I use almost exclusively the new GW paints (only occasionally using P3 or old GW paint pots). I start out by layering the colors that I want to shade, so all of the silver gets a coat of Leadbelcher, the gold Sycorax Bronze and any bone gets Zandri Dust. Then all get a layer of Argax Earthshade. Next, the silver gets a layer of Ironbreaker, the gold gets a layer of Gehenna's Gold and then Burnished Gold (as it is a highlight I don't use too much of it and it is still an old paint pot). The Bone gets layers of Ushabti Bone and Screaming Skull. The black is just straight up Abaddon Black, with a highlight of P3 Coal Black. Then I paint all of the reds, which are layers of Khorne Red, Evil Sunz Scarlet and Troll Slayer Orange. Finally, I paint the blue, with layers of Macragge Blue, Altdorf Guard Blue and an edge highlight of Calgar Blue. This process is counter intuitive, as most people will start with the largest areas and then build up to the small details, however it's what works for me, which is the best painting advice for anyone.


No comments:
Post a Comment